Introduction
HSTOnline provides flexibility in arranging data in a way that works for you. Many of the pages throughout the program give you the option to group and sort the displayed items, collapse and expand your groupings, choose which columns are included in the display, set the widths of columns, and quickly find the item(s) you are looking for using the search feature. Settings are memorized automatically for each user so you can set your pages in a way that works for you, and your Teacher and Student Users can personalize their own views.
Automated Paging
To optimize performance, each list in HSTOnline displays no more than 500 items at a time. When there are more than 500 items to be displayed, the list will be divided into additional pages of no more than 500 items each. Searching or filtering a list will search the entire list, not just the items currently in view.
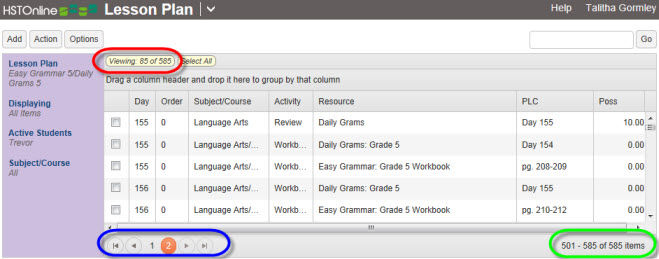
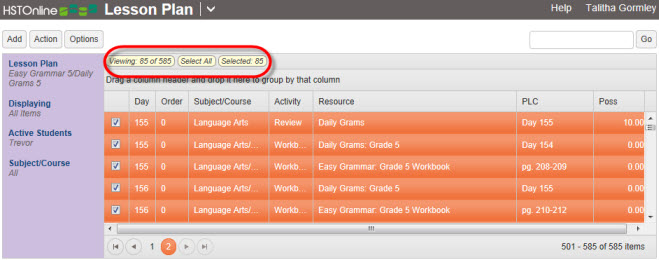
For example, if you have a Lesson Plan with 585 items, displaying all the items in the Lesson Plan will result in a display of two page: one with the first 500 items, and a second with the remaining 85 items.
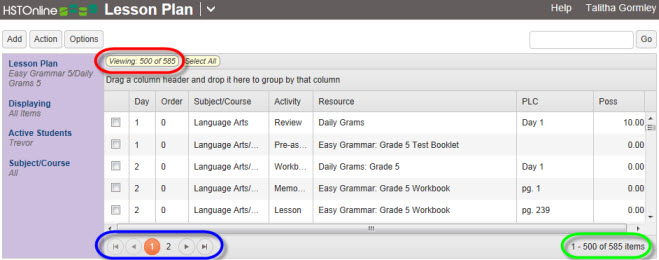
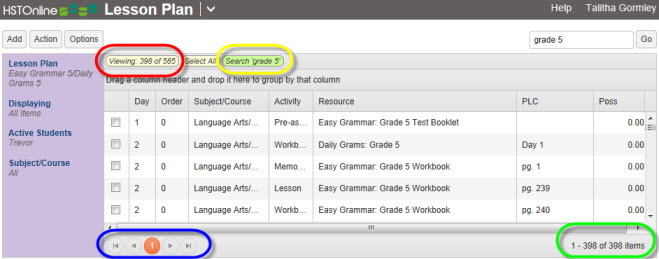
- Red Circle: Viewing badge - will show the number of items being displayed out of the total items in the list
- Blue Circle: Pagination - shows which page you are viewing. Use the arrows to move backward or forward between the pages.
- Green Circle: Shows which items of the total are displayed on the current page.
When you use the filters or search box to limit the list, the display will adjust accordingly. In the example below - searching for 'grade 5' returns 398 out of the original 585 items. Since that is less than 500 items total, the list will display all items in a single page.
When you use the 'Select All' badge, all items in the current page will be selected.
Grouping
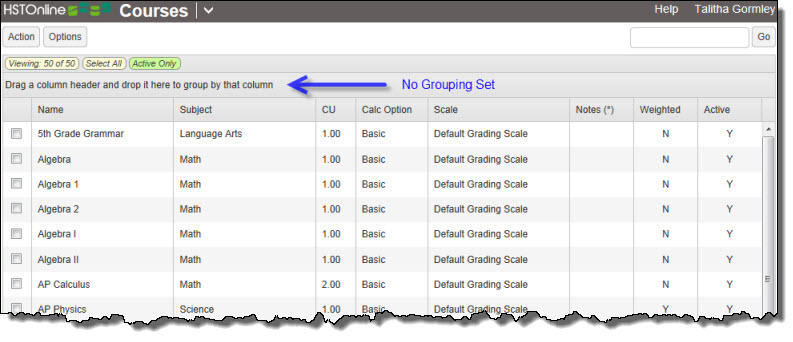
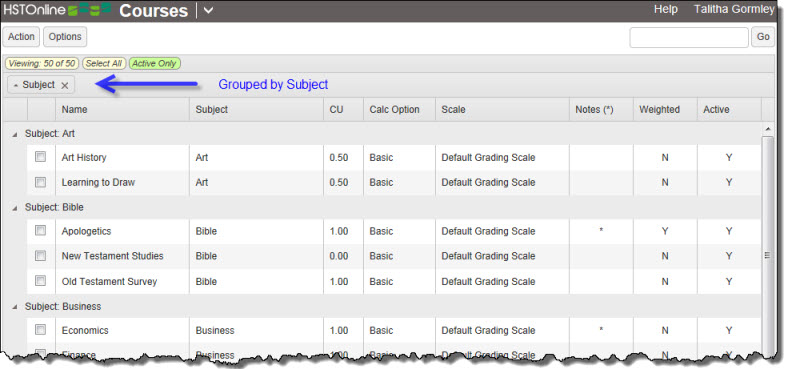
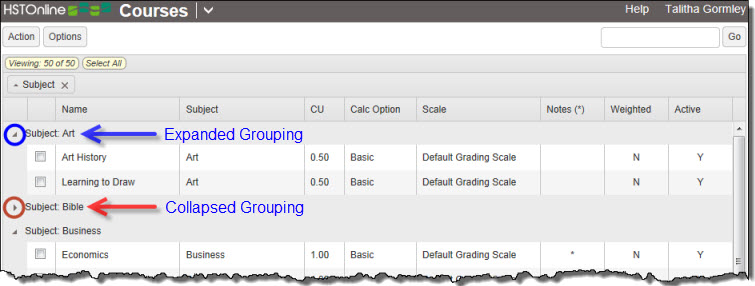
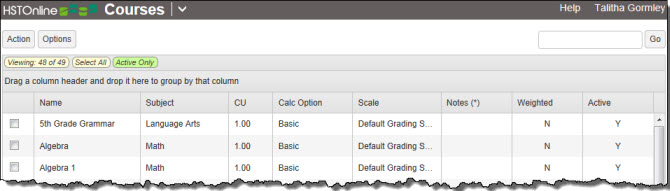
Grouping gives you a way to view your list of items in sections. For example, in the Agenda - List View if you group by Subject, you'll see all the Art items grouped together, then all the English items, then the Math, etc. You can group by any one or more columns in any page that allows the grouping function. Your grouping settings will remain until you change them. Each user can set his/her own grouping preferences. The images below show the Courses List in its ungrouped, default state, followed by the Courses List grouped by the Subject column.
Adding a Grouping
- To add a grouping, click or touch on a column name and drag it into the header above the column names and below the 'badges' area.
- To add an additional grouping, click or touch on a different column name and drag it into the header area as well.
- You can change the hierarchy of your groupings by changing the order of the column names in the header area. The label that is farthest left will be the primary grouping, followed in order by the other labels you chose to group by, from left to right.
Removing a Grouping
- To remove a grouping, click or touch the X on a column name in the header area.
Collapse/Expand
When your data is grouped, you can choose to open or close groupings as needed. When you add a grouping, the groups begin as expanded so you can see all the items belonging to that group. You can click on the arrow in any group section heading to collapse or expand that group.
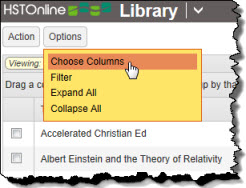
- Click or touch the Options button and select 'Collapse All' to quickly close all the headers to locate and expand just the ones you want. 'Collapse All' is applied to the highest grouping level.
- Click or touch the Options button and select 'Expand All' to open all the groupings working on that section, you can use Expand All to open all the groupings again. 'Expand All' opens all groupings
at all levels.
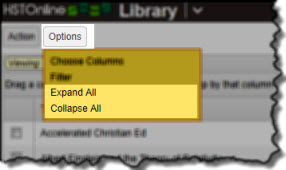
Options: Collapse All/Expand All
Your collapse/expand settings will be retained only while you remain on that page. If you Add or Edit items or any time the page is refreshed, the list will return to its default view showing all groups expanded.
Sorting
You can sort your items in ascending (alphabetical) or descending (reverse alphabetical) order using the Sort feature. Each Grouped field will have an ascending sort applied. For example, if you have Grouped the Agenda- List View by Activity, then Activity: Lesson will be displayed before Activity: Quiz which will be displayed before Activity: Test, etc. In addition to the sorting of your grouped items, you can also sort by any non-grouped columns of your choice. Your sorting settings will remain until you change them. Each user can set his/her own sorting preferences.
To sort by a column, click or touch the column name. When you sort by more than one column, the sorts will be applied in the order that you set them.
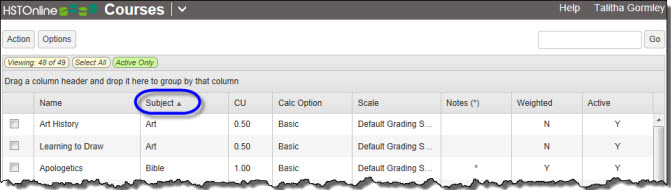
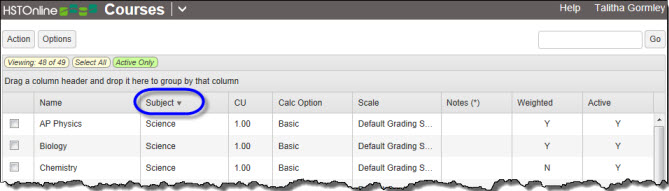
- To sort ascending, click or touch once. An up arrowhead will appear
- To sort descending, click or touch twice. A down arrowhead will appear
- To remove sorting, click or touch a third time. The arrowhead will disappear
Here is list of the default sort settings. All sorting is in ascending order, except as noted:
| Grid | Default Sort |
|---|---|
| Activities | Name |
| Agenda - List View | Date, Student, Start Time/Block, Order, Description |
| Assignment Locations | Name |
| Chore Names | Name |
| Courses | Name |
| Grade Levels | School Year, descending |
| Grading Scales | Name |
| Lesson Plan | Day, Order |
| Lesson Plan Names | Name |
| Library | Title |
| School Years/Terms | Start (date), descending |
| Skills | Grouping, Area/Discipline, Objective |
| Skills Progress | Grouping, Area/Discipline, Objective |
| Students | Display Name |
| Subjects | Name |
| Transcript Supplemental Lists | From (date), descending |
Choosing Columns for Display
You can select which columns to display in each list view. Hiding a column does not remove any data you have entered into that field. You can hide or show columns at any time. For some lists, such as Activities and Assignment Locations, all available columns are displayed in the default view. For others, such as Library and Lesson Plans, a limited number of columns have been selected for the default view. You can use the Choose Columns menu to change your personal settings. Your column selections will remain until you change them. Each user can set his/her own column view preferences.
Choosing Columns
- Click or touch the Options button at the top of the page you want to work with.
- Click or touch the Choose Columns option.
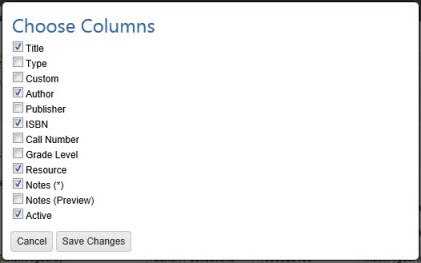
- All column options will be listed, based on your Program Options.
- A checkmark will appear next to all visible columns
- No checkmark will appear next to hidden columns
- Click or touch to add or remove checkmarks to select/deselect the desired columns. You must have at least one visible column.
- Click or touch:
- Cancel to abandon the changes and close the Choose Columns window.
- Save to commit the changes and close the Choose Columns window.
|
|
Column Widths
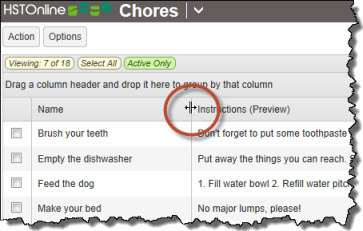
You can use your mouse to reset the widths of any columns. Column widths are retained for each username so you and your students can set the widths to your personal preferences. You cannot reset column widths without the use of a mouse pointer.
Setting Column Widths
- Place your mouse over the column line until you see the column width icon.
- Move your mouse to the left or right to adjust the column width.
Note: When you refresh a page, the total width of all columns will auto-adjust to fill the page from the left margin to the right margin. However, your relative column widths will be retained.
Filter Options
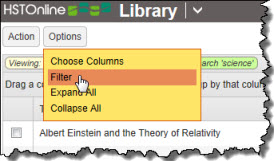
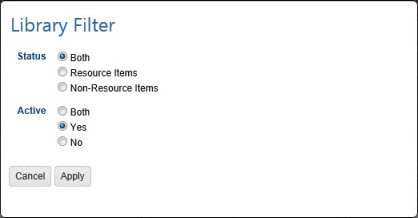
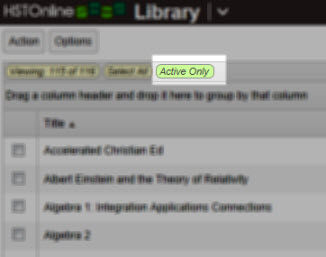
Use the Filter options on each page to further refine which items will be displayed. Filter options will vary depending on the area of the program you are working with. When you have selected any filter setting that will cause fewer than all of the items to be displayed, a green badge will be displayed at the top of the listing, showing the types of items being displayed (Fig. 3).
The Filter Options for the Agenda - Calendar View and Agenda - List View are more complex. Please see the Agenda - Calendar View Filter Options and Agenda - List View Filter Options Help Pages for specifics.
Setting Filter Options
- Click or touch the Options button at the top of the page you want to work with.
- Click or touch the 'Filter' option.
- Click or touch a radio button to select a filter setting for each category displayed.
- Click or touch:
- Cancel to abandon the changes and close the Choose Columns window.
- Save to commit the changes and close the Choose Columns window.
Using the Search Box
When your lists become long, the search function can help you quickly find the item(s) you are looking for. Type your text into the Search box, click the Go button, and HSTOnline will show you all items in the list that have an exact match to your entry in any of the text fields in the grid, even if the column has been hidden from view. Included in the search will be the first 150 characters of the various (Preview) columns for Notes, Directions, Instructions and Objectives.
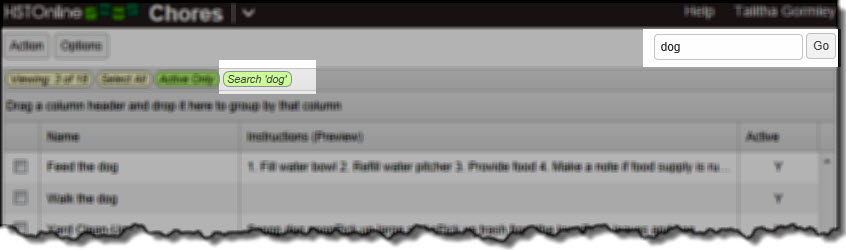
To return to a normal view of the list, delete the entry in the Search box and press the GO button or click or touch the Search badge at the top of the listing to clear the limitation.
The Search Box is available on the following pages:
- Activities
- Agenda - List View
- Assignment Locations
- Chore Names
- Courses
- Grading Overview: Grading Calculation
- Grading Scales
- Lesson Plan
- Lesson Plan Names
- Library
- Shared Lesson Plans
- Skills
- Skills Progress
- Subjects
Student Colors
When adding or editing a Student, you can chose to set a background color for the Student. This color will be used in the Student name cell of the following lists:
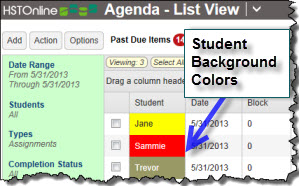
|
|
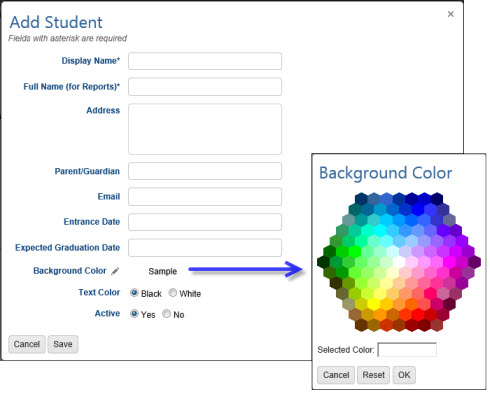
- When adding or editing a Student, click or touch the Background Color field name or the pencil icon to open the background color selector.
- Click or touch any color in the spectrum to select it for this Student.
- Once you're happy with the color, click or touch OK.
- To change a Student back to the 'no color' option, click the Reset button.
- Text Color: After selecting your background color, the selected color will appear in the window with the word 'Sample' to assist you in choosing whether to use black or white text - whichever is easier for you to read on the background color you have selected.
- Click or touch Save to keep your changes.
Item Type Colors
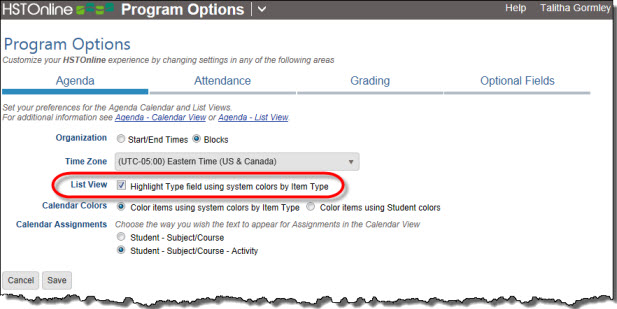
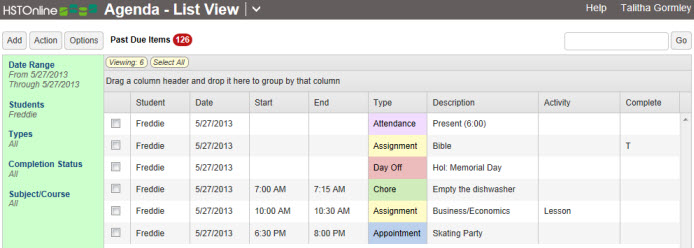
In Program Options: Agenda you can choose to use the background colors of each type from Agenda - Calendar View as the background for the Type field in the Agenda - List View to help you differentiate more easily between them.